 React Finland
What David learned at React Finland Workshop with Nik Graf
If you are not yet familiar with React Finland, you should. Let me tell why: It’s like a summer camp. Each year, you can see familiar faces who are really excited to share their knowledge with the community. I like the format: one workshop day and two days of conference on a single track.
In this article, I am going to cover the workshop of Nik Graf: Advanced React with all the new buzzwords!
React — Reinvented#
In the last months, React has changed a lot with some new features (not all are in a public release yet):
New lifecycle methods
Suspense and Time Slicing — Upcoming feature
Hooks
And more
In this context, Nik Graf ran a workshop for intermediate and experienced React developers.
All the materials can be downloaded on the GitHub repo 2019-react-finland-workshop.
Sketchnote with React Hooks and Performance in React (David Leuliette))](/2bc3ee6d44976f22e95914e6fac3204b.jpeg)
React Hooks#
Hooks are everywhere. Since React 16.8 was released, it’s a hot topic in the react community. Things like class component and functional component are a thing from the past, long live function based components.
There are literally millions content available on the internet to introduce react hooks. During this day this is what I learned:
useEffect can have 2 arguments. The first one is a function that contains imperative. The second can take an array of values that the effect depends on.
You can create custom hooks to share code, but try to follow a convention like useMyhook to be explicit.
useLayoutEffect for synchronous operations, but use it with caution because it’s blocking rendering and expensive operations can lead to a bad experience.
useLayoutEffect is perfect for auto-height textarea
⚠️ Pro tip: Don’t put hooks in loops or if…else. To avoid mistakes there is eslint-plugin-react-hooks for that.
If you want to dig on custom hooks, Nik Graf built this cool website to collect all of them: Collection of React Hooks
Performance#
As in video games, we want a slick experience with 60 frames per seconds and 15 ms delay. When I am writing this article the react-devtool profiler is not the best for that. The Google Chrome profiler (console > performance) is better in this scenario.
Google Chrome profiler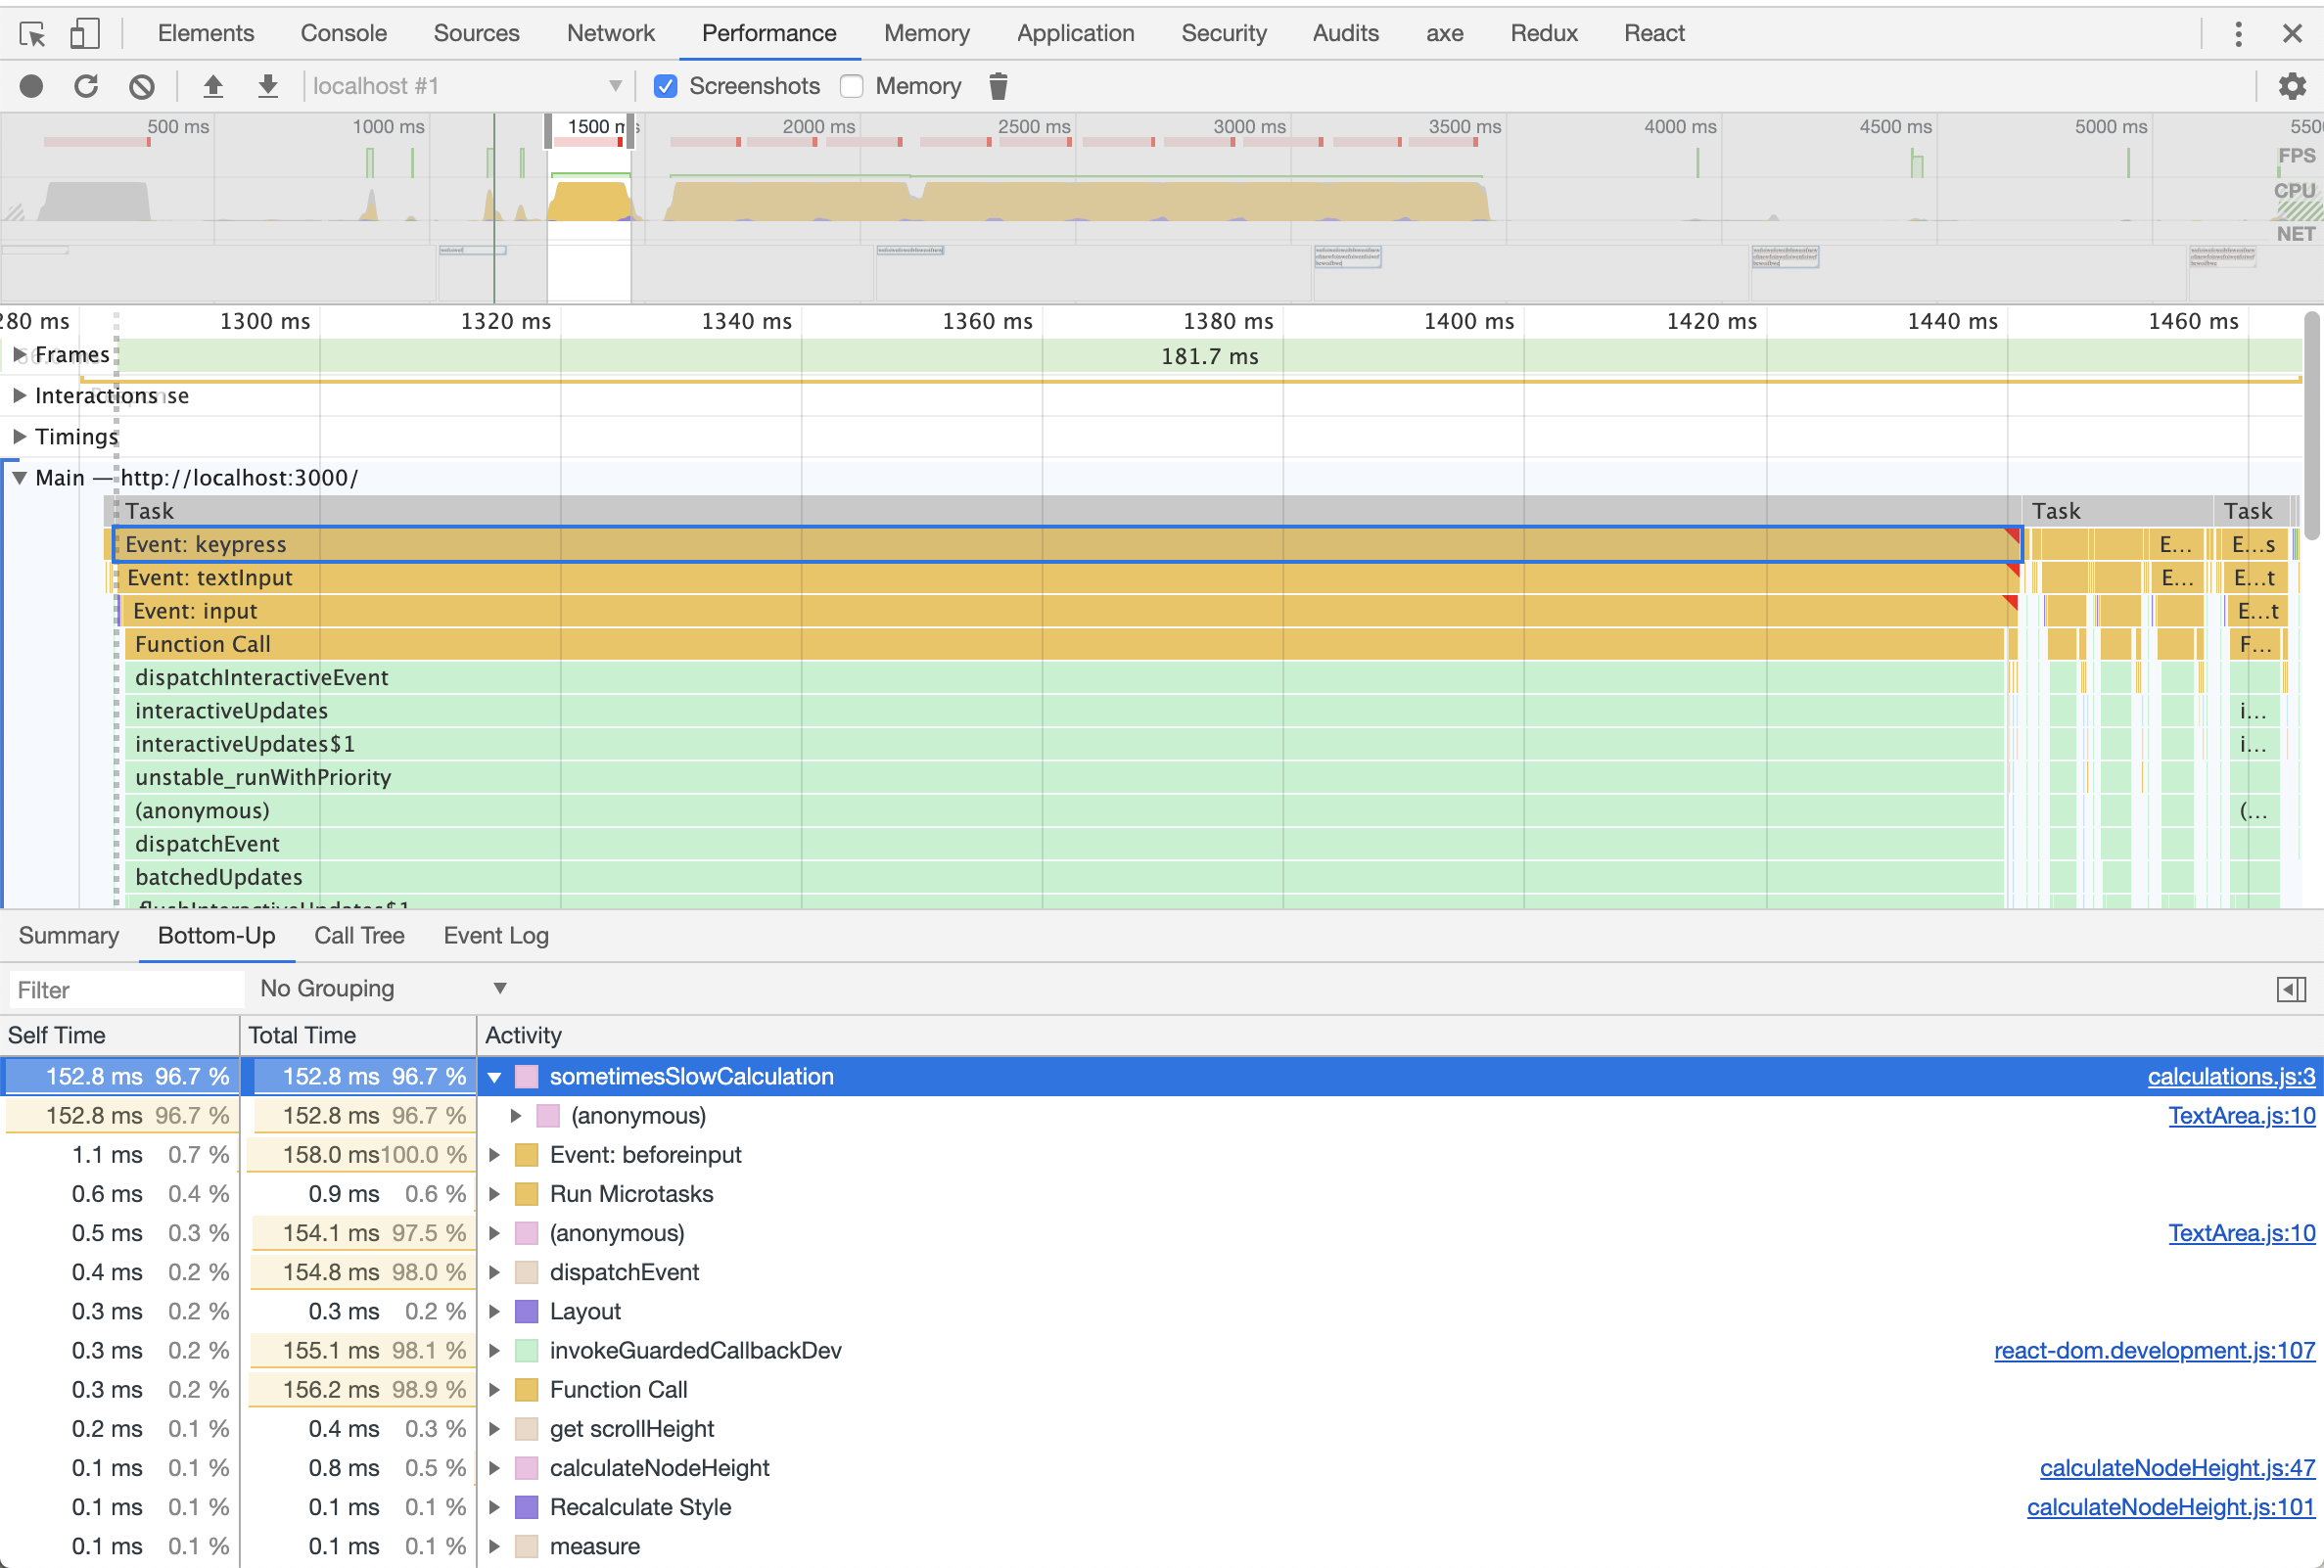
In this example, we found our performance enemy: the function sometimesSlowCalculation.
⚠️ Pro tip: When you start to dig on performance start your journey by measuring what you are doing.
Sketchnote with Time Slicing, Suspense, and Context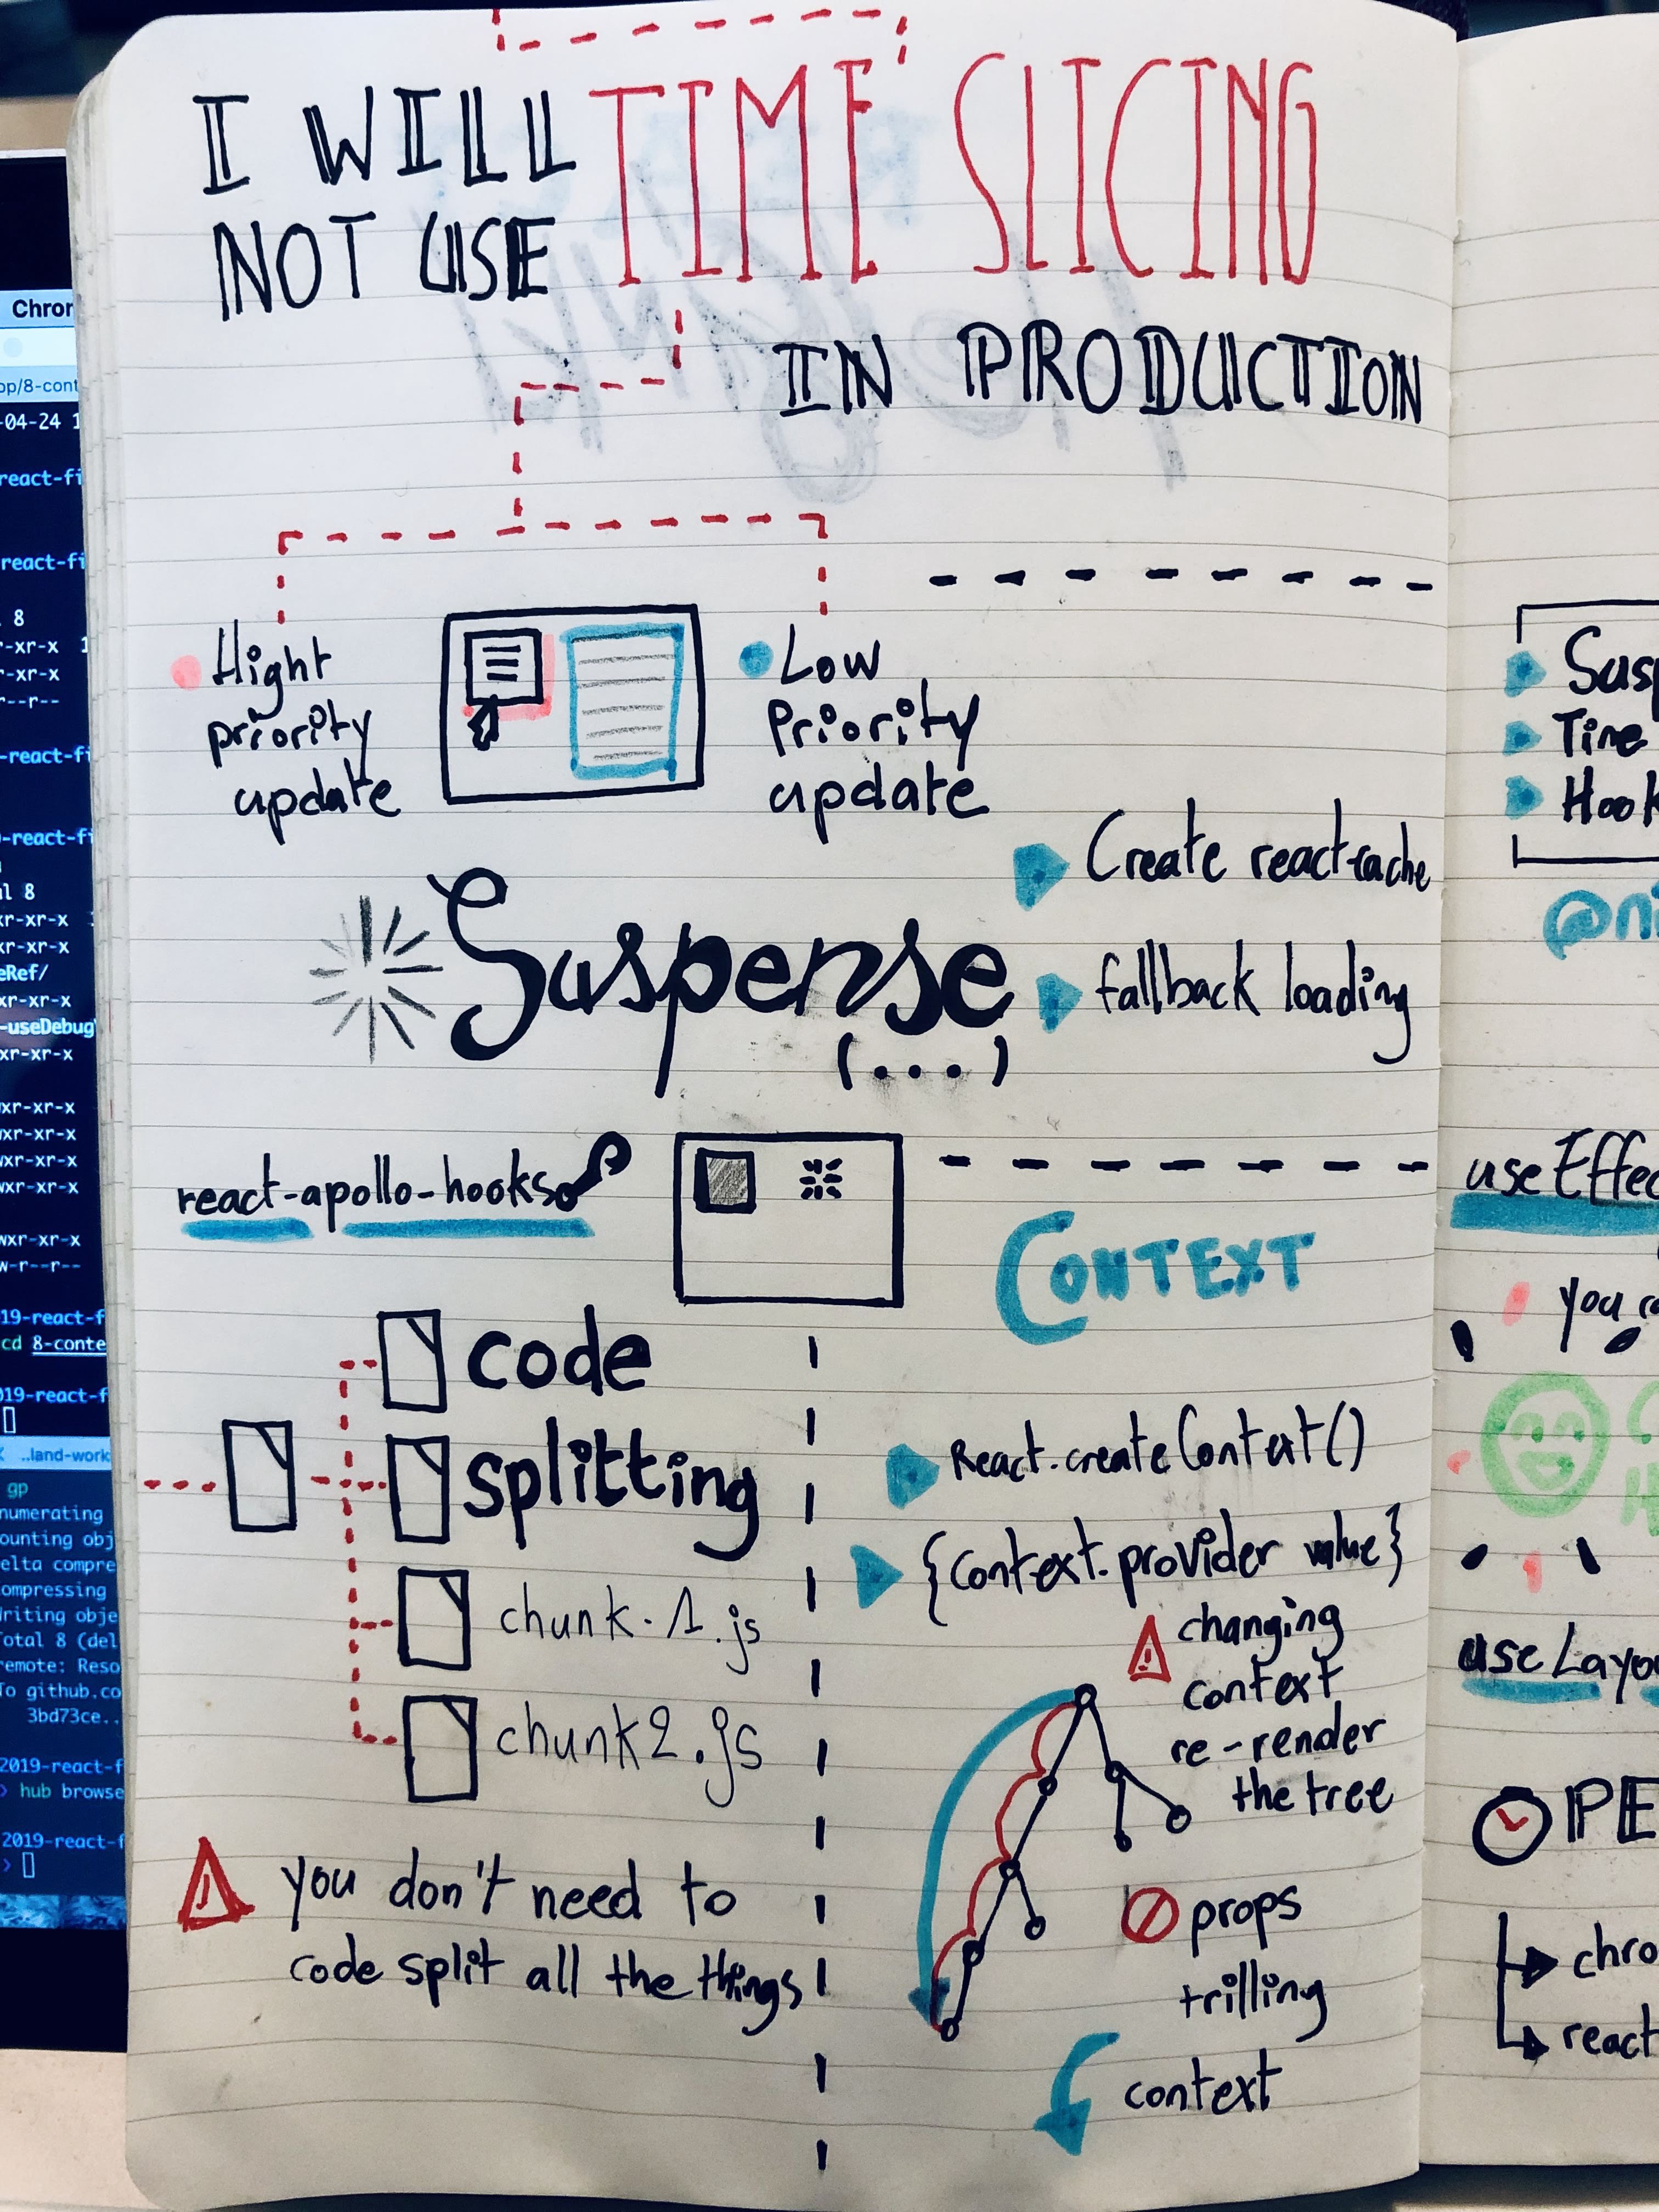
Async React#
In the second part of the workshop, we played with some unstable API. If you want to follow this path, repeat after me 3 times the next sentence:
I will not use time slicing in production
— First rule of the React Club
Time Slicing#
Awesome React Markdown preview application
Imagine you need to create a CMS application. 2 column layout and you want a nice writing experience with real-time feedback for the user.
On the left, you can edit markdown content and on the right, we have the preview in real time. For the <TextArea> we need to have a fast experience. On the other hand, we can delay the preview because it’s gonna be slow with huge content.
First, we need to create a new function deferredPreviewUpdate
<TextArea
  value={text}
  onChange={value => {
    setText(value);
    **deferredPreviewUpdate(value);**
  }}
/>
Calling the function with unstable_LowPriority allows the rendering part to have a small delay. Just remember, this code is experimental for now, but it was a great introduction to the concept of time slicing.
function deferredPreviewUpdate(text) {
  unstable_runWithPriority(unstable_LowPriority, function() {
    unstable_scheduleCallback(unstable_LowPriority, function() {
      const content = markdownToReact(text);
      setPreview(content);
    });
  });
}
Check the full example in part 5-time-slicing.
If you want to dig more on how scheduling in User Interfaces, I recommend this article by Philipp Spiess: Scheduling in React.
React.lazy and React.Suspense#
The Suspense API allows components to “wait” for something before rendering. When I am writing this article Suspense works only with one scenario: loading components dynamically with React.lazy.
In the future, Suspense will support other use cases like data fetching.
On this exercise, I used react-apollo-hooks and it looks promising. Instead of using this classic loading state pattern to display a loader like this:
if (loading) {
  return <div>Loading …</div>;
}
You need to do 2 things. First, add another param to you GraphQL query:
const { data, error } = useQuery(profileQuery, { suspend: true });Second, add a fallback loading component:
<React.Suspense fallback={<div>Loading...</div>}>
  <Profile />
</React.Suspense>
You can check the diff on the exercise on GitHub: Add Suspense
Cascading loading experience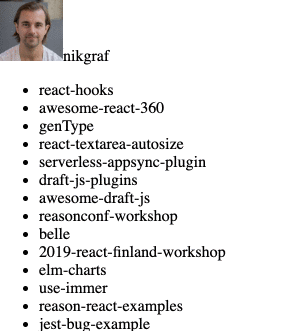
⚠️ Pro tip: This feature is not yet available for server-side rendering.
Code Splitting#
_Code splitting your app can help you “lazy-load” just the things that are currently needed by the user, which can dramatically improve the performance of your app. — quote from the Code Splitting documentation
In this exercise, we used the code splitting feature to reduce the size of the bundle of our app.
Code splitting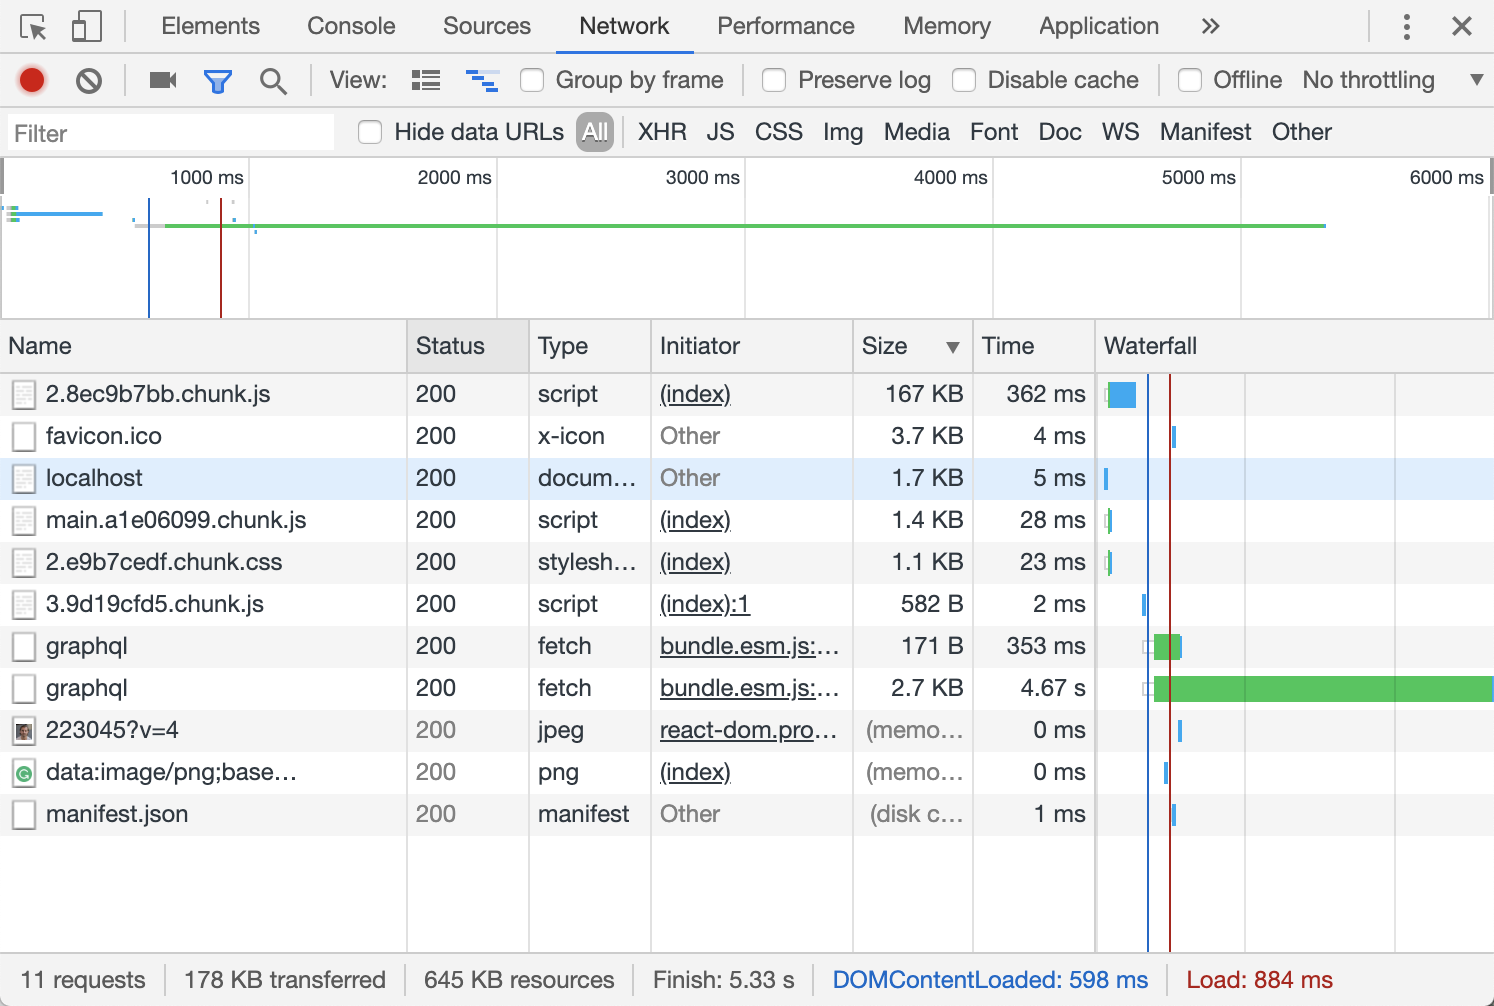
⚠️ Pro tip: You don’t need to code split everything. Sometimes a single HTTP request with one big file is enough.
Context#
The context API can be used as your global store, aka you don’t need Redux for everything. That said use best to learn the pros and cons before jumping ship.
Take the example of a profile page. For a currently authenticated user, the avatar is not often updated. It’s a perfect use case for using context because it solves the classic problem of props trilling.
In the context exercise, we worked on theming React applications. First, you need to create a context like ThemeContext:
ThemeContext.js:
import React, { **createContext **} from "react";

export const themes = {
  dark: {
    foreground: "#fff",
    background: "#666"
  },
  light: {
    foreground: "#222",
    background: "#eee"
  }
};

const ThemeContext = createContext({
  theme: themes.dark,
  toggleTheme: () => {}
});

export default ThemeContext;
After that, in this example, we are using hooks to use the context.
Toolbar.js:
import React, { **useContext** } from "react";
import Button from "./Button";
import ThemeContext from "./ThemeContext";

function Toolbar() {
  const { toggleTheme } = useContext(ThemeContext);

  return (
    <>
      <Button onClick={**toggleTheme**}>Toggle Theme</Button>
    </>
  );
}

export default Toolbar;
⚠️ Pro tip: Remember that when using useContext, every change in the context store will trigger a re-render of all the components where it’s used.
React Finland 2019
I really enjoyed all the different exercises. It was a great workshop and now I am more confident with the usage of Hooks in React.
As a recap, here is the list of the exercises:
- useEffect and useRef
- custom hooks and useDebugValue
- useLayoutEffect
- Performance
- Time slicing
- Suspense
- Code splitting
- Context
You can clone the repo https://github.com/nikgraf/2019-react-finland-workshop to do your homework. 🙂
If you are interested to level up your knowledge in the React ecosystem, subscribe to the newsletter to receive pre-sales early-bird access for the next edition.
👋 See you next year!